

Today is a special day in our household – there’s a birthday… 🙂 Last year, I created some printable Santagrams and started a new birthday tradition of creating and sharing something that had special meaning to me as a kid.
This week’s “Montessori Week” with Guidepost Parent presented the perfect opportunity to honor the fond memories I have of my Montessori birthdays and their lovely Walk Around the Sun tradition.

At my Montessori school (and many others), on our birthdays, kids formed a big circle and held hands. In the middle, a candle was lit. The birthday honoree held a globe and walked around the circle – one time around for every year, symbolizing the earth’s rotation around the sun.
After each revolution, our parents or teachers shared special events in that year of life – a photo we brought to class or a story our parents shared.
I think it’s such a beautiful observance, so in the spirit of the day, I created this cardboard birthday celebration candle – complete with rotating parts!
Note: We wanted to create something that stood off the floor and had some weight to it, but if you’d like to simplify this process or would rather not use cardboard and a glue gun, we’ve shared a modification to speed up and simplify the DIY below.

Download our free printable templates and print onto heavy cardstock (be sure to choose “borderless printing” in your printer options). Cut out each template piece.

Gather a cardboard paper towel tube and a medium-sized shipping/cardboard box. Using the smaller “seasonal trees” half-circles, flip face down, line up to make a complete circle, and trace to create a donut shape on one of your box sides.
Cut right along the lines. This will be the base for your “season name” disc. We want it to be a little smaller than the paper disc so it’s hidden. Repeat the process on another piece of cardboard.
Cut about an inch inside the lines for this one. It will be the base for your “seasonal trees” disc, and again, we want it to be hidden from view, so it should be smaller than the paper disc.
Cut a large square out of the remaining cardboard to create a base for your entire candle. I also cut out eight small squares (I’ll explain why in a few steps…)
Once you’ve cut your circular discs, make sure you can push your cardboard tube through the hole in the middle – the larger bottom disc should fit snugly.
We want to be able to rotate the disc with the trees so kids can practice matching the trees up with the correct seasons, so the smaller disc should be a bit looser so you can comfortably spin it.
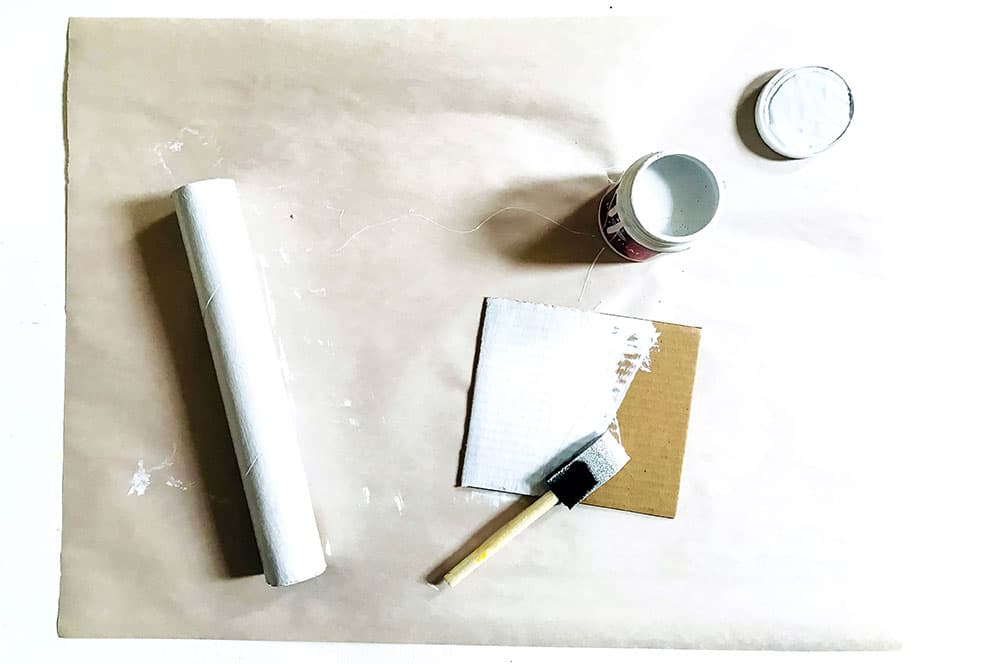
Paint your cardboard tube and the square cardboard base for your candle with white acrylic paint. It should dry fairly quickly, but you can hit it with a hairdryer for 15-30 seconds if it feels like it’s taking a while to dry.

Using a glue stick, glue the halves of your printed discs onto their cardboard bases.
While the glue dries on your discs, glue the front and back of the candle flame together, ensuring the cut lines at the bottom line up on both sides.

Using a glue gun, glue the bottom of your cardboard tube “candle” to the middle of the painted base. Cut along the cut lines at the bottom of your flame circle.
*Note* – To give our base some extra weight, once the glue had dried, I tossed some small rocks down the center of the tube to add some sturdiness.
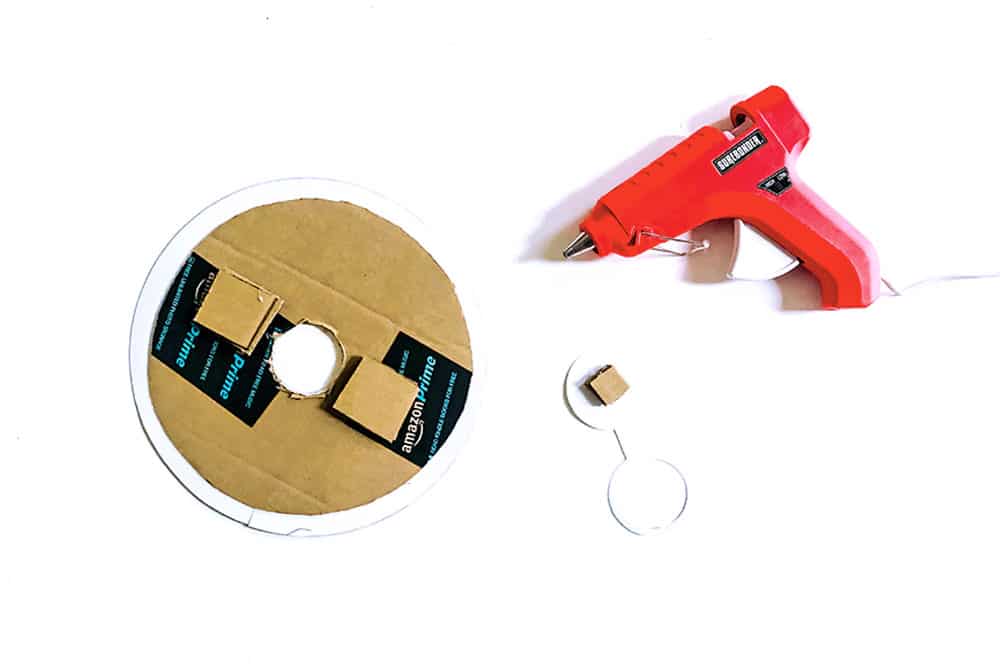
This is an optional step, but it adds some nice dimension and makes it easier for kids to rotate the moving pieces.
Flip your “seasonal trees” disc and earth paper piece over. Hot glue two sets of three small squares together, then glue those squares to the bottom of your “seasonal tree” disc.
Glue the remaining two squares together, then add those to the back of your earth paper piece. This raises your pieces up a bit, adding some nice height and space between your moving pieces.
Once your hot glue has dried, slide your discs onto the cardboard tube in the same order we did (season names on the bottom, seasonal trees next, then the paper earth piece on top).
Push your flame over the top of your cardboard tube (no need to glue). Now your candle is ready for a party!
The goal of Montessori education is to foster independence, a sense of self, and a love for learning, so birthday traditions like this are aimed to educate and celebrate growth.

Montessori education is known for its unique and educational approaches to teaching children, and this extends to how birthdays are celebrated as well. Whether you’re celebrating at home with your kiddo or are leading the celebration in a classroom, here are few more Montessori birthday traditions you can combine with your birthday walk craft:
In preparation for the child’s birthday, parents and the child create a timeline or “life line” of photos and memories for each year of the child’s life. This can then be shared and discussed during the celebration, helping to give the child a sense of continuity and progression in their life.
This is a book that is updated every year with pictures and stories about the child’s year. It is read or presented during the birthday celebration. This helps foster a sense of personal history and reinforces a positive self-concept.
The child may be interviewed about their favorite things, their friends, their likes and dislikes, and their hopes for the coming year. This can be a fun way for the child to reflect on their past year and look forward to the next.
Some Montessori schools encourage children to bring something to share with their peers on their birthday, reinforcing the joy of giving as well as receiving.
In some Montessori classrooms, the birthday child may be given a special job or role for the day, such as being the class helper. This emphasizes the child’s growing abilities and responsibilities.
Singing a birthday song or playing an instrument can also be a part of the celebration. Some Montessori classrooms have specific birthday songs that are different from the traditional “Happy Birthday” song (at least, mine did!).
Here are ten easy ideas for a Montessori birthday tray with practical skill activities or learning exercises themed around birthdays. These ideas are designed to promote fine motor skills, numeracy, literacy, sensory processing, and practical life skills.
Remember, it’s important to tailor these activities to the age and skill level of the child, and always ensure that any small parts are safe and appropriate for the child’s age to avoid any choking hazard.
For a few more Montessori-inspired activities, visit this collection of winter-themed practical life skill ideas, some winter-themed counting, sorting, and simple math with the help of our tactile favorite – felt! Or create a lovely tabletop winter sensory garden with natural materials.
GETTING READY TO TRY this?
I love seeing all the ways people make these ideas their own! If you're sharing the results of one of our projects, mention or tag me with @barleyandbirch, or share it in the comments of one of our Pinterest project pins.


