
Make a cute recycled DIY bug observation box with your kids this summer! Perfect for outdoor STEAM learning and nature play.
Welcome to bug season! The flowers are bursting open in the garden and the bugs are BACK in a big way. Just this week I’ve seen my first butterfly, box elder bug, bumblebee…even a mosquito (it IS Minnesota, after all).
It’s a great time for little ones to get out and peep around the backyard for signs of bug life, and we have just the recycled tool to help them make the most of it – a fantastic bug observation box they can make, decorate and take right outside for invertebrate investigation.
I went into this project with a few specific requirements in mind. I really wanted this observation box to be totally bug-friendly and ethical – creating a nice habitat for THEM as well as being a tool for US.
I knew it needed to have a way for bugs to easily get in, but also get out. We needed a good way to watch them from the outside, and I wanted to make sure the box could easily be filled with supplies from their natural habitat AND emptied out.
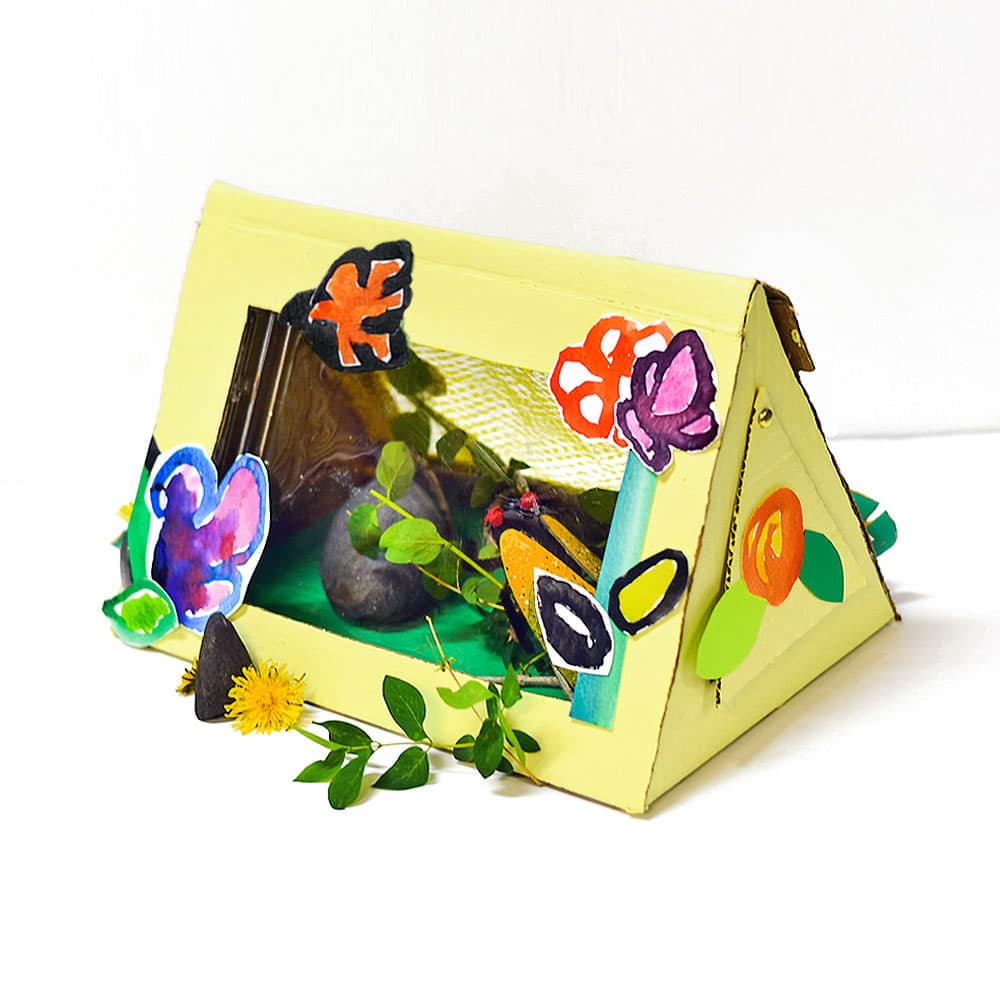
With all those things in mind, I designed a bug observation box that has a little “door” for bugs on the side, but also opens all the way across the top for easy access and emptying (yay!).

There’s a full side of mesh to provide lots of fresh air to our bug friends, but also a big window on the other side that’s clear (recycled) plastic we can easily see through.
As a final touch, we decorated ours with flowers to help our bug box blend into the natural scenery…I’m hoping bugs are as attracted to beautifully handmade art as I am – ha!
This is a project that will probably require some adult help, and it’s a fun way for the entire family to get in on some bug-themed play and learning.
I think our little observation box is best used for insect investigation outside – so spread out a big blanket, grab a magnifying glass, and enjoy a sunny afternoon outside with the bugs!
As it was built to be more of a bug playground, there are lots of nooks and crannies bugs could crawl through, and you may not want those little critters exploring your house.
For more adventures in recycled insect crafting, grab a clothespin and a plastic spoon to make your own clip-on cicadas, grab our free printable bug scavenger hunt for an insect-learning afternoon outside, or visit our whole collection of 50 awesome insect learning resources and play activities.
BASIC SUPPLIES:
OPTIONAL:

Gather up all the basic materials. To make a bug observation box just like ours, you’ll need a cardboard box, a large plastic berry container, and the mesh from a produce bag.
HOWEVER, there are TONS of ways to make a bug box with substituted supplies or even completely different items! You can use our box for inspiration, then work with what you have.

To make a box just like ours, you’ll want the two narrower sides of your box to be triangular, and the wider sides to have holes for windows. I planned out the shapes, then drew cut lines on each side of the box with a permanent marker.
You don’t have to be exact with this, eyeballing it is fine! I wanted the cardboard sides surrounding our cutout windows to be fairly equal in width, and just used the width of the ruler as a way to measure and create fairly equal spacing.
Note: Remember to size the window openings to fit your supplies – so make sure the window opening isn’t too big for your berry lid/mesh bag.
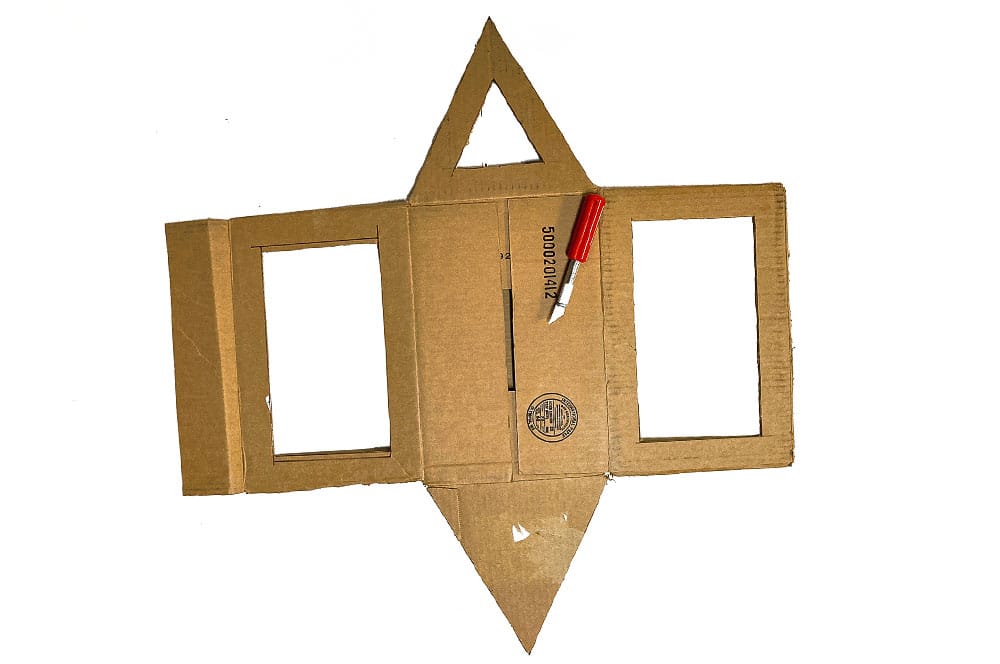
Cut down each side of your box at the four corners, so it’s laying flat, then use a utility knife to cut out the triangle shapes, side door, and window openings.
Important: When cutting, remember to leave ONE box flap attached on a long side of your box (note the flap on the left-hand side below). We’re going to turn this into the flap that covers the top of our bug box.

Once you have your basic bug box pattern cut out, use a scrap of the leftover to make a triangular cover for the side door. Make it roughly half an inch larger than your cutout, and make small holes where the white dots are below that a metal brad can fit through.

This is an optional step, and admittedly takes a bit longer, but I just love the way it looks! Use tempera or acrylic paint to paint the outside of your bug box (you don’t need to paint the bottom – just the sides you’ll see). Hit it with a hairdryer to speed up dry time.
You could add an opportunity for more artful processes by splattering or sponge-painting with different colors of paint.

Use a glue gun to attach the mesh from a produce bag to the INSIDE of one of your bug box windows. I recommend an adult helping with this step, as it can be tricky to push the mesh down while avoiding the hot glue. You can use a popsicle stick or similar tool to push the mesh into the hot glue around the edge.
We also glued a piece of green paper to the floor of our bug box to simulate grass.

Flip your box around to the other side and hot glue the clear plastic berry container cover on.
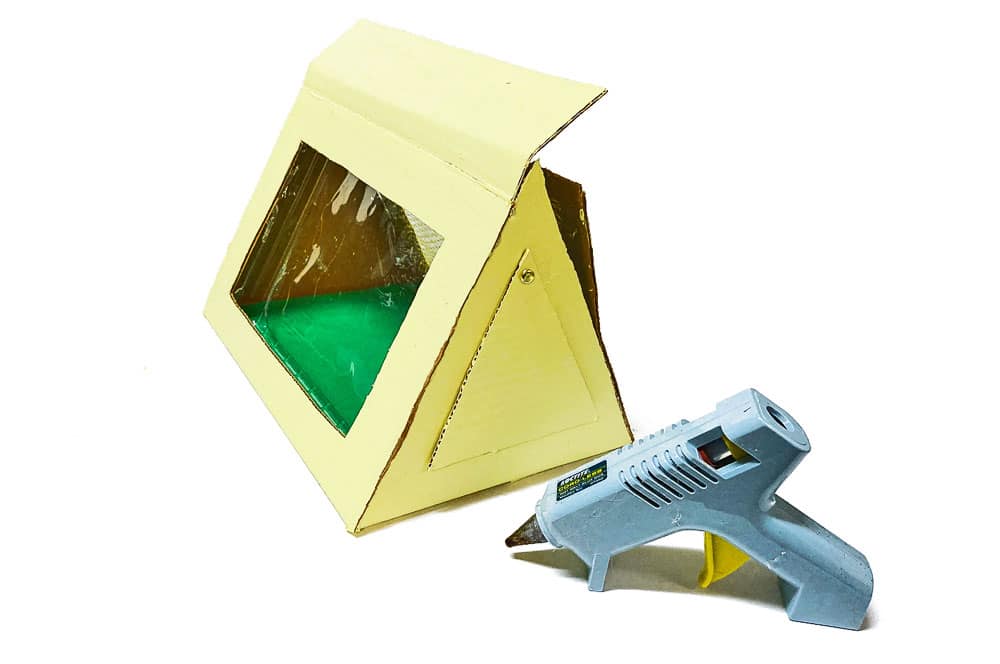
We’re going to bend the cardboard over the top of our bug box to create a velcroed flap, so gently bend it over the top and make a nice folded crease in the box.
Use a hot glue gun to glue the side of your bug box with the flap to the triangular sides of your bug box.

Flip your box to the opposite side, and use a glue gun to glue halfway up both sides. We’ll be leaving the rest unglued so that we can easily pull that long open when we want to access the inside.

This is an optional step, but you can add some pizazz to your box with decorations! You can use the garden as inspiration to make your own painted flowers as we did, decorate with natural materials, or use any decorative craft supply you’d prefer! Put your name on it, make a “Welcome, bugs!” sign, or just leave it as is.
Fill your box with a couple of rocks, twigs, or other backyard finds, then set your bug box outside in a shady spot – leaving the side door open for visitors. You’ll be amazed at the number of bugs that will come to investigate!
When dealing with actual LIVE bugs it’s always good to remember that some bugs are okay to touch and others are not, so a good rule of thumb is to stick to observation and keep it outside.
As with all animal-watching patience is required – treat the bugs with the same respect you’d treat anything else, and be gentle when moving or turning your bug box to see. When it comes time to bring your box inside (our particular version is NOT waterproof), gently turn your box on its side and empty all the supplies out, making sure all bugs have safely gone back into the grass or gardens with them.
For little bug-lovers who may be interested in keeping a “pet” bug, you can use it as an indoor habitat along with one of our DIY clothespin cicadas, or another crafted bug (keep reading for some more ideas…).
This kind of pretend play is a wonderful way to introduce younger kiddos to the idea of pet responsibilities. They can clean out their bug box, freshen the nature supplies, and “feed” their homemade bugs with bottlecaps full of cut leaf “food” and water.

I’m always a fan of pairing a bit of reading with a craft activity, and bug themes are no exception! Bugs seem tailor-made for the most LUCIOUS illustrations, and a few of our very favorites to page through during bug observation time are:
The best way to ensure you have lots of visitors to your observation box? Turn your backyard into the perfect bug habitat! I’m loving this recycled bug hotel or this milk carton version.
Go one step further and make a DIY bee bath or DIY butterfly feeder like this one from Babble Dabble Do – great for attracting and sustaining ANY pollinators!
Fill up your bug box and fill out your bug collection with these bug specimens – all different species and sizes! Try the technique artist Elise Gravel uses to fashion little winged wonders out of clay and nature supplies!
Make the coolest cardboard tube grasshopper. Turn rocks into ladybugs with this loverly painting project, or recycle old plastic Easter eggs into DIY lightning bugs that ACTUALLY light up!
There are SO many ways to make a bug observation box with things you have around the house. Whether you want to make MORE, or are looking for something a bit simpler, we’ve found so many good ideas – like this juice bottle bug catcher, or this cute little bug house and simple DIY bug jar from PBS Kids.

For more nature-themed spring crafts and activities turn a shoebox into a cool DIY nature explorer’s kit for on-the-go outdoor investigation or download a free printable nature scavenger hunt! Find even more ways to enjoy your backyard with our collection of over 50 activities and ideas for gardening with kids.
*A note about affiliate links: We strive to use simple, earth-friendly supplies that can be purchased locally whenever we can, but sometimes we find the best universally available options, a rare eco-friendly find, or a niche product only available on Blick Art Materials, Amazon, Etsy, or Woodpeckers Crafts. When included in our supply list, these products are affiliate links, and if you click through to make a purchase we receive a small commission that helps us re-order these supplies!


