
There’s a complete kids’ DIY nature explorer kit tucked into this recycled shoebox trunk, and you can make your own with recycled supplies!
“I’m so glad I live in a world where there are Octobers.” I’m not sure whether it’s the cozy, colorful beauty of autumn or the knowledge that winter’s cold will be blowing in soon, but I could happily spend the whole month of October outside.

Fall hides little surprises at every turn – from the corners of the backyard to the pond & park at the end of the street or the marshy woods around the block.
Inspired by the fun we’ve been having investigating the neighborhood, we decided to make this marvelous nature explorer’s trunk for outdoor escapades!

Indiana Jones meets a future Rachel Carson, George Washington Carver, or Winona LaDuke in our special little explorer’s kit. Open the lid to reveal a neatly packed collection of nature observation tools – stowed securely for organization and safe travel!
Like a minified pop-up science lab, this kit opens and stands on its own to create an on-the-go nook for nature investigation.
Whether your little outdoor-lover is more adventurer or naturalist, this cardboard case opens the door to imaginative STEAM-based learning & research.

And here’s my favorite part…look closely, and you’ll see we managed to make the whole thing out of common household supplies and some cleverly recycled items from the trash bin. From start to finish this project is an adventure in sustainable learning.
Per the usual, I became slightly obsessed with making our trunk look like a proper mini replica of the real thing. As you can imagine, it turned into a bit more than your average 5-minute DIY.
If you love the idea of this but don’t want to put in tons of time, don’t let my full process scare you away. There are so many ways to simplify the project, and you can take so many of these ideas and create a variation on ours.
Save a spot in your trunk for our outdoor explorer printable pack or free printable leaf activity kit. Use it on a backyard safari, or pair it with an incredibly cool upcycled DIY bug observation box!
BASIC SUPPLIES:
OPTIONAL SUPPLIES:
NATURE KIT ACCESSORIES:

Use our step-by-step tutorial to create your own kids’ nature kit from a shoebox and embark on exciting outdoor adventures!

Use a shoebox and two pieces of scrap cardboard for the base of your explorer trunk. Measure the inside of your shoebox, subtract a half-inch from all sides, then cut two pieces of scrap cardboard to those dimensions.
Cut one long side of your shoebox lid at the top & bottom to create a flap (as shown in the middle). This will create the “hinge” for your trunk lid.

Use a glue gun to glue the flap of your shoebox lid to your shoebox, as shown below. Cover your shoebox with a brown paper bag or brown butcher paper (like you’re wrapping a school book!)
I wanted our explorer trunk to look like aged, worn leather, so I folded and crumpled up the grocery bag we used. When covering your box, use the glue gun liberally on all the flat sides and along the edges – this will hold the paper flat to your box.
You can skip this step or paint your shoebox instead if you prefer!
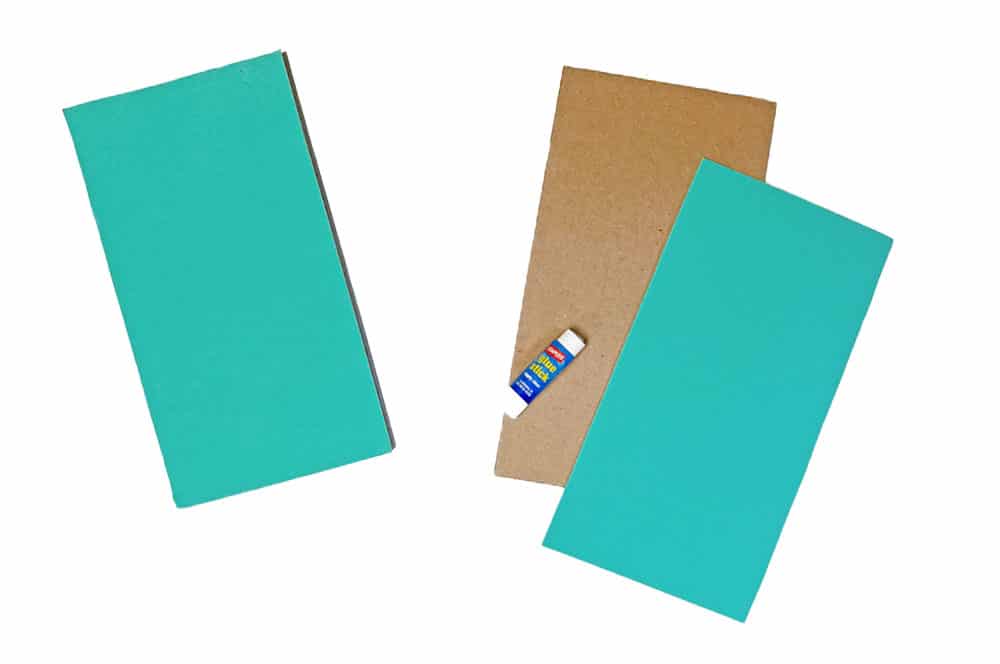
Cover your cardboard squares with colorful paper.
This isn’t a necessary step, but it adds a bit of bright color and makes your trunk look a bit more finished.

Determine the placement of your nature explorer supplies. What would you like to hold in your explorer’s trunk?
Place any items you’d like to include on your inner cardboard pieces and make small dots with a black pencil or marker on either side of each item, as shown below. This is where you’ll put your rubber band holders to hold each item securely in your box.
Use the point of scissors or a large blunt needle to poke holes for each rubber band holder.

Cut each of your rubber bands. Thread the end of a cut rubber band through a wide-eyed needle, then push the needle through the holes you made for each rubber band holder.
Secure the rubber bands to the cardboard with small knots at the back – leaving enough slack at the front that you’ll be able to slip your supplies into the elastic holders.

Put your supplies in the elastic holders to make sure they fit the way you’re expecting.
Once you’re happy with your setup, use a hot glue gun to attach the large cardboard squares to the inside of your shoebox as shown.
Note: When gluing down the square on your shoebox lid, make sure it’s centered on the lid so your box can close completely. We initially glued it down flush against the outer edge and realized we couldn’t shut our box. If it’s hard to make sense of what I’m describing, you’ll figure it out as you make it!
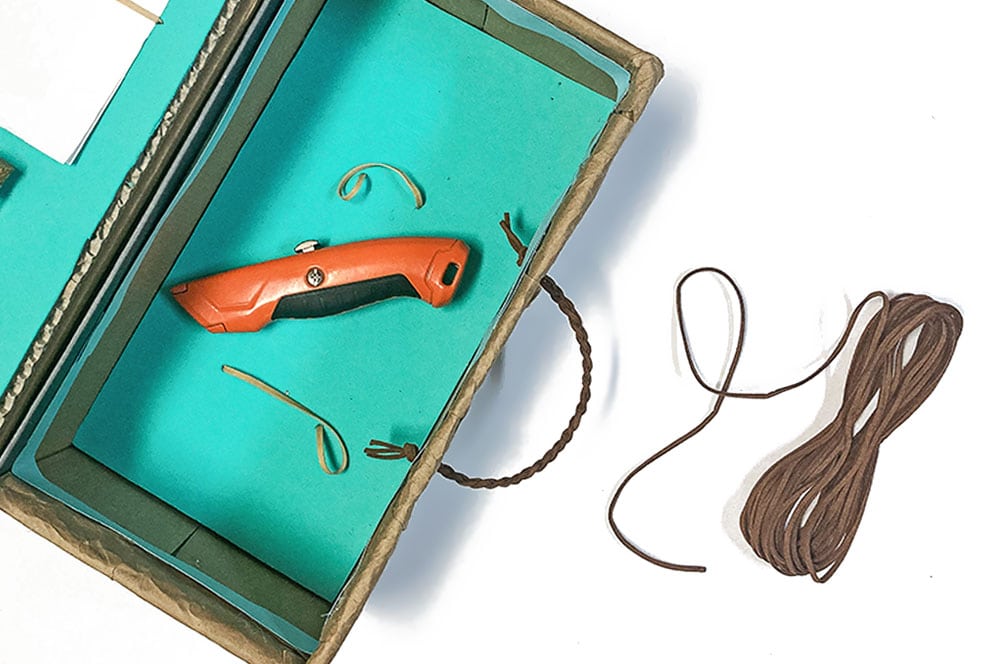
Use braided leather cording, rope, or similar to create a simple handle. We made two holes on the side of our box, then threaded leather cording through the first hole.
Make a knot on the inside, braid, then push through the other hole and knot to finish.

Every explorer trunk needs some interesting explorer flair, right?! We used our nature explorer trunk sticker set, leather cording, and paper trunk corners, but you can add your own drawings, stickers, or decorations too!
Our nature explorer trunk sticker set includes full-color or outline-only templates for the trunk corners. Cut out, wrap around the corners (folding over at the edges as you would when wrapping a gift). Secure with hot glue.
Note: we glued our stickers onto the trunk for extra durability.
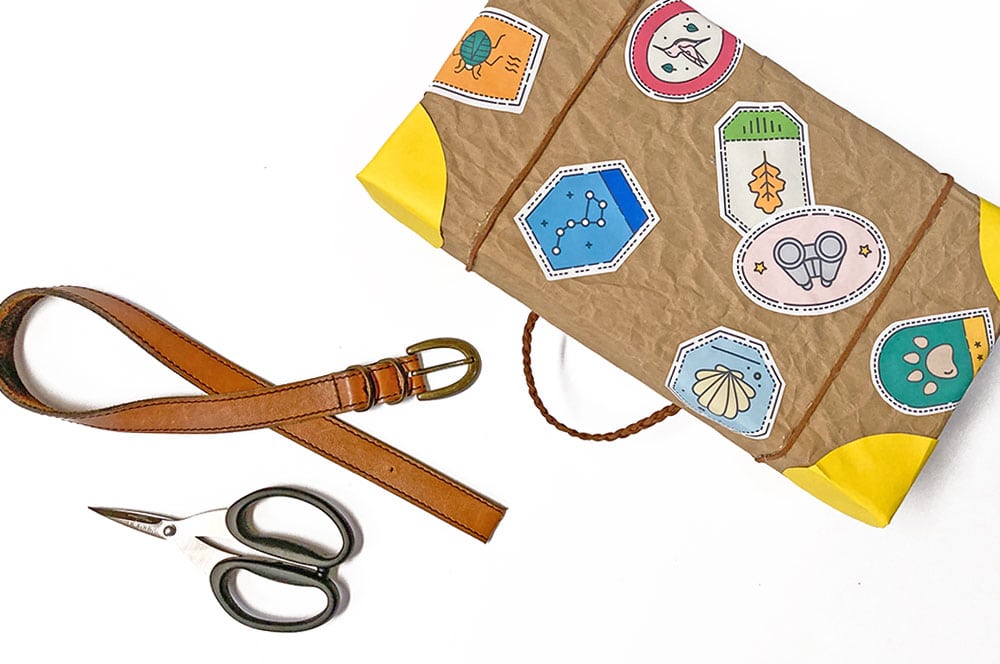
Recycle an old belt and wrap it around your explorer trunk for safe carrying. In addition to making your trunk look authentic, the belt will hold the trunk closed when headed out on nature excursions.
If you don’t have a belt to recycle, you can use a shoelace, a piece of ribbon, or thick rope instead.
We trimmed our belt and added an extra hole to make it the perfect size. Using a sharp pair of scissors, we had no trouble poking a hole through the belt where needed and cutting off the edge.
As always, exercise great caution if cutting with extra-sharp tools.

Nature adventure awaits! The beauty of this flexible trunk is that you can change up the supplies you take every time you use it. What will you need for your first adventure?
Note: I avoided putting breakable glass tools in our trunk, opting instead for plastic versions that will withstand some rough-and-tumble outdoor play. I can’t think of anything worse than opening this up to find a box of broken glass!
To be totally honest, I can’t even BELIEVE how well our trunk turned out in the end. It was one of those rare projects that came out exactly as I had pictured it (NEVER HAPPENS), and it has been the most fun accessory for afternoon excursions.
I’m happy to report that after many trips around the backyard, our trunk and elastic holders have held up to heavy use well!

Download our free printable leaf activity kit and use it in tandem with this wonderful leaf-rubbings lesson. Learn about leaf color with a fall color leaf lab, or go for a nature-math mash-up with one of these hole-punched leaf activities.
Recreate this easy tree ring science project from Edventures with Kids. Or visit this wonderful collection of Autumn STEM challenges that includes a super cool trick for determining the size of a tree! Do you have a fruit tree? Collect a few pieces and use this fruit exploration series to learn a little about the science behind what we eat.
Take your explorer kit out to the garden for some flower sorting science). Before you head in, toss a few cuttings into a collection jar for a frozen flower sensory experiment.
Collect local pond, lake, river, or ocean water and create a tabletop aquatic ecosystem with a tutorial. As a cool example of how to do this easily and ethically, visit this mesmerizing video series.
Hoping to use your explorers kit for bug observation? Check out these wonderful insect investigation tips for kids from the California Academy of Sciences first (safe and ethical!). The American Bee Federation has a great collection of kid-specific resources for pollinator learning. Or, for little ones who prefer their bugs stinger-free, combine observation with one of these butterfly STEAM activities.
Try one of these cool rock science experiments.

Another benefit of this little trunk is that it can hold just about anything – let your imagination run wild with variations on the trunk theme and other ways to play with this cool case…
Looking for a mini activity book like ours that you can pack into your trunk?
Good news – that’s part of our printable nature explorer activities! Filled with pages of outdoor observation and exploration prompts, it’s perfect for hours of self-led nature learning and play.
Or toss a good read into your kit with one of our favorite nature-themed picture books.

For another way to enjoy collected nature with your littles, try making an incredibly simple (but stunning!) gradient leaf banner. Or try a very unique art-making process with our photocopied fall leaf collages using a totally unique and unexpected process.
Itty-bitty nature adventurers might enjoy using their nature finds to make playdough fairy forests, or spending an afternoon sorting mouse mail.
*A note about affiliate links: We strive to use simple, earth-friendly supplies that can be purchased locally whenever we can, but sometimes we find the best universally available options, a rare eco-friendly find, or a niche product only available on Blick Art Materials, Amazon, Etsy, or Woodpeckers Crafts. When included in our supply list, these products are affiliate links, and if you click through to make a purchase we receive a small commission that helps us re-order these supplies!

Comments are closed.


Aloha from Hawai’i! This is an absolutely genius activity! I can’t wait for my public library to open for storytimes so we can make Explorer Kits for some island exploring. What an exciting series of storytimes I can plan for littles up to age 4 and for early elems in grades K-2. Mahalo, thank you from this Children’s Librarian.
Brenda, aloha! Thank you so much for your kind comment. Libraries are one of my very favorite places to regularly visit, so I’m just giddy that you’ve found a project here you can use in yours. I hope your visitors have so much fun on their adventures when you reopen. Island exploring in Hawai’i…oh those lucky little readers!! Mahalo, from this library lover.