
Did you play thin ice when you were little? It was such a simple game, but so much fun! We’re celebrating classic 90s activities this week, and whilst looking for game inspiration, I ran across an old photo and thought, “Hey, I could make that!”. Amazingly, I already had everything I needed to make my own version of a thin ice game, and you probably do too…

If you don’t know or don’t remember, the game was played by placing small water-covered marbles on a paper towel-like piece of “ice” one by one until the water soaked through the paper towel, breaking it apart and sending all the marbles into a pan below.
The person who put the last marble on without the paper towel splitting apart won the game. Fairly simple, right? But when you add tongs and use water beads, this game becomes an insanely fun fine motor skill activity, sensory game, and cool STEM experiment for kids!
For more sensory ice play, try making colorful ice block sculptures you can enjoy outdoors in the winter or indoors anytime!
Note: We prefer to shop locally or use what we have at home, but this list contains Woodpeckers Crafts, Etsy, Blick Art Materials, Bookshop.org and/or Amazon affiliate links for reference. As affiliates (and Amazon Associates), we make a small commission on qualifying purchases.*
Start by cutting 6 rectangles out of a piece of sturdy cardboard (mine measured 7″ long by 1.5″ wide) cut a notch into that top that’s about 1/2″ wide and 3/4″ deep. These are going to be the support legs the embroidery hoop rests in. You can make your legs taller if you want. I painted the sides with acrylic paint to give it a nice, finished look!
Each support leg is made by gluing 2 of the rectangles together lengthwise. Join at about a 45-degree angle as shown and glue together with a hot glue gun.
Grab a piece of paper towel, and put it in an embroidery hoop (our hoop had an 8″ diameter). Trim the excess paper towel off and pop on the cardboard support legs. Place an empty bowl under your “ice” to catch the beads when it breaks. 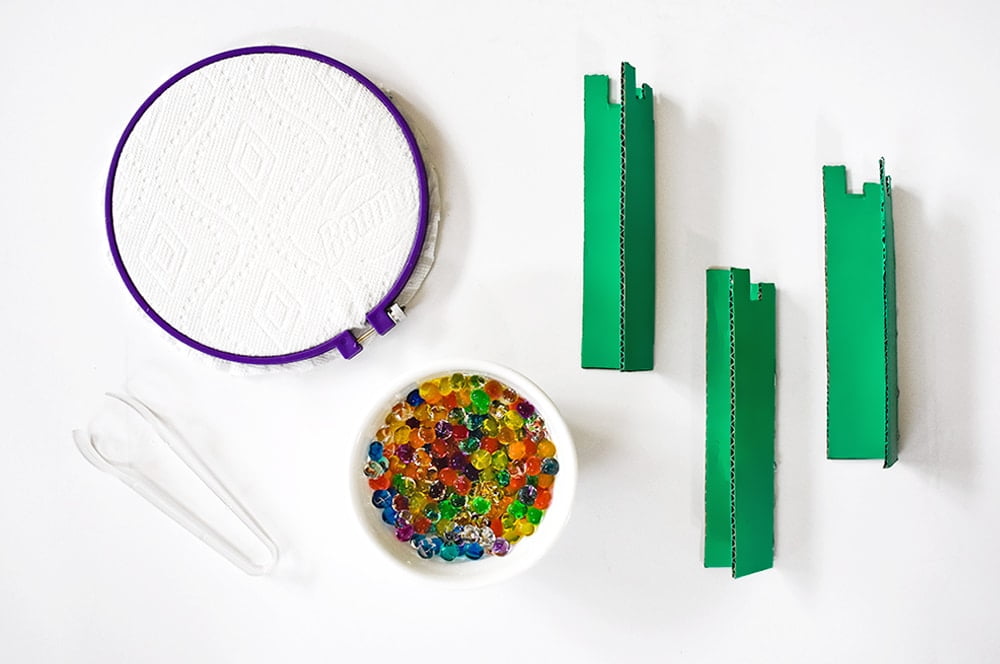
Put 1-2 cups of water beads into a bowl filled with water (you’ll want them to be wet) grab a pair of tongs, and you’re READY to PLAY!
Moving the water beads with the tongs is a wonderfully fun way for kids to practice fine motor skills in a new way! The game itself is also a great STEM experience and beginners’ science experiment – teaching small lessons in mass, density, and gravity.
Of course, the most exciting part is waiting for that fateful moment when the ice breaks and “plunk, plunk, plunk!” – all the water beads spill through the bottom!

Love this throwback game and can’t wait to share a few of your own childhood memories with your little one? I’ve put together a round-up of some other classic 90s games you can DIY!
Interested in trying some tapioca pearl taste-safe water beads instead of the polymer kind? A couple of things you should know…
*A note about affiliate links: We strive to use simple, earth-friendly supplies that can be purchased locally whenever we can, but sometimes we find the best universally available options, a rare eco-friendly find, or a niche product only available on Blick Art Materials, Amazon, Etsy, or Woodpeckers Crafts. When included in our supply list, these products are affiliate links, and if you click through to make a purchase we receive a small commission that helps us re-order these supplies!
GETTING READY TO TRY this?
I love seeing all the ways people make these ideas their own! If you're sharing the results of one of our projects, mention or tag me with @barleyandbirch, or share it in the comments of one of our Pinterest project pins.