

These little paper acorns are adorably festive table decorations that hold a heartwarming secret inside! The caps lift off the top of these nutty boxes, leaving kids a place to collect and share messages of gratitude and thanks.

This paper acorn craft is a great way to encourage your kids to spend a few minutes on mindfulness this season (and even include template pages to create their own tiny book of gratitude they can fill up and keep inside!).
Whether you use them to adorn a holiday table, pack them with seasonal favors for gifting, or fill them with mini Thanksgiving coloring books, they’re sure to provide a few happy smiles.

These templates were originally designed for a special holiday guest post over on hello, Wonderful. Though the free printables are no longer available on their site, I’ve made them available to download here!
For another darling fall acorn craft, grab a brown lunch bag and markers, scrap paper, or paint pens, and visit the simple tutorial for our stuffed paper bag acorns or use our fall favorites template bundle to create one-of-a-kind acorn artwork.
Note: We prefer to shop locally or use what we have at home, but this list contains Woodpeckers Crafts, Etsy, Blick Art Materials, Bookshop.org and/or Amazon affiliate links for reference. As affiliates (and Amazon Associates), we make a small commission on qualifying purchases.*
FOR THE BOXES:
FOR THE GRATITUDE BOOKS:


Print the desired free printable paper acorn box template pages on heavy cardstock (be sure to choose borderless printing in your printer options).
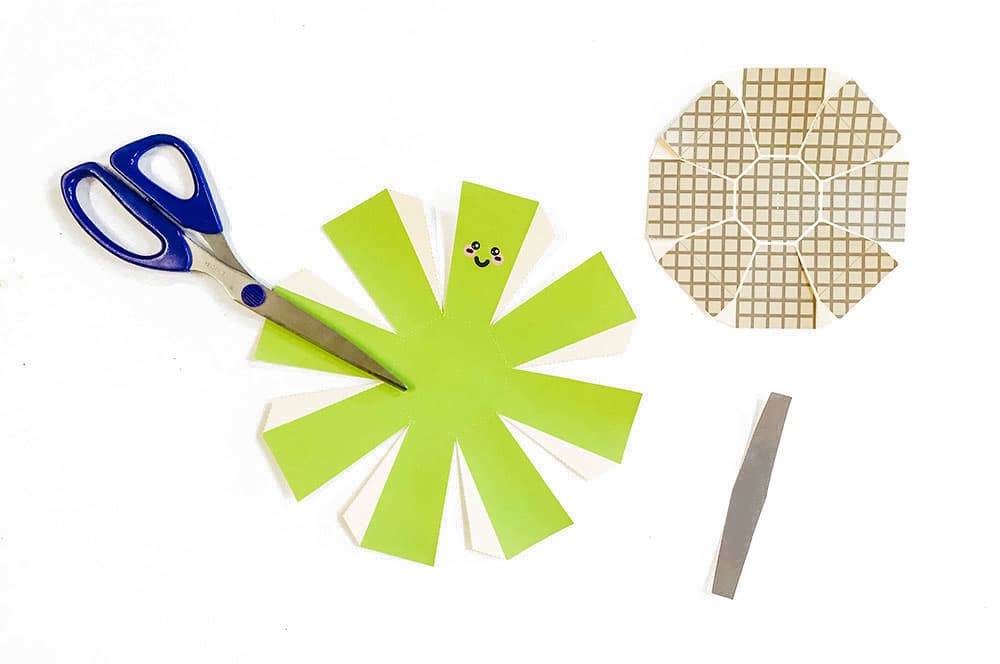
Cut out all of your template pieces – the bodies, caps, and stems.

Put the cap and stem pieces aside, and using the dotted guidelines, fold and crease along all 8 sides of the body to create tabs for gluing and assembly. Then fold and crease along the dotted lines where the sides meet the box bottom.

Once you’ve made all your creases, apply glue to all tabs. Fold each side up to meet the next, lining the tabs up along the side and top and gluing them to the back. Turn your box on its side and, applying some gentle pressure, run your finger up and down each tab from the inside – just to make sure your tabs are well-glued!
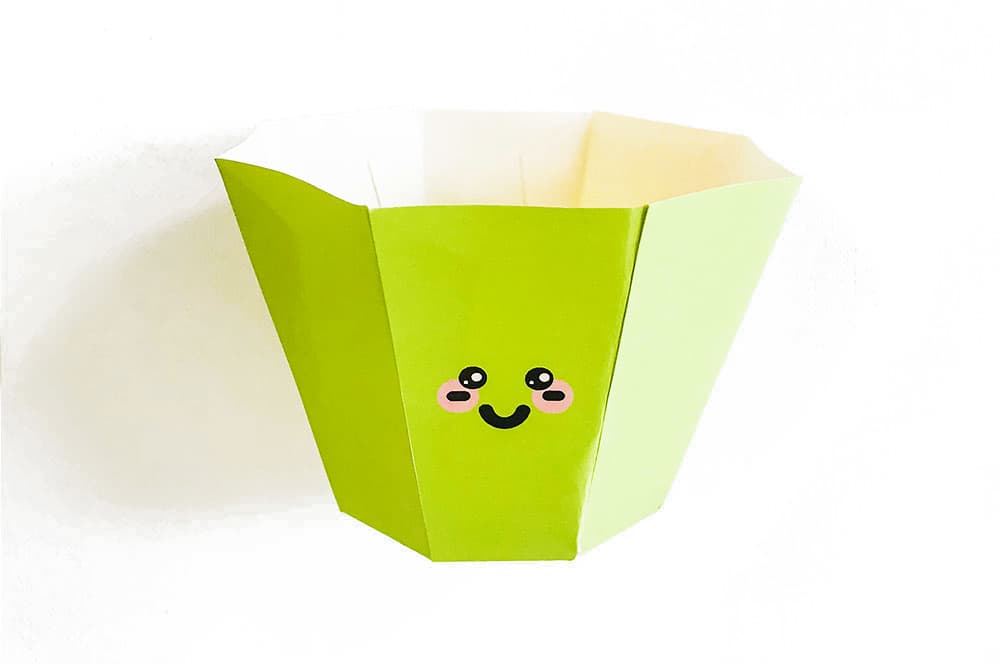
Once assembled, let dry for roughly 15 minutes.

While your acorn body dries, we can assemble the cap using the same process, but with three sets of folds instead of 2.
Before you start folding, use an X-Acto knife along the thin dotted line in the middle of your cap. This is where we’ll add the stem!

Ready to fold! Fold and crease all 8 pieces where the sides of your cap meet the middle. Next, we’re going to fold and crease along the light brown lines that are about 1/2 an inch from the edges of your cap. Finally, fold and crease the small tab pieces for each cap piece.
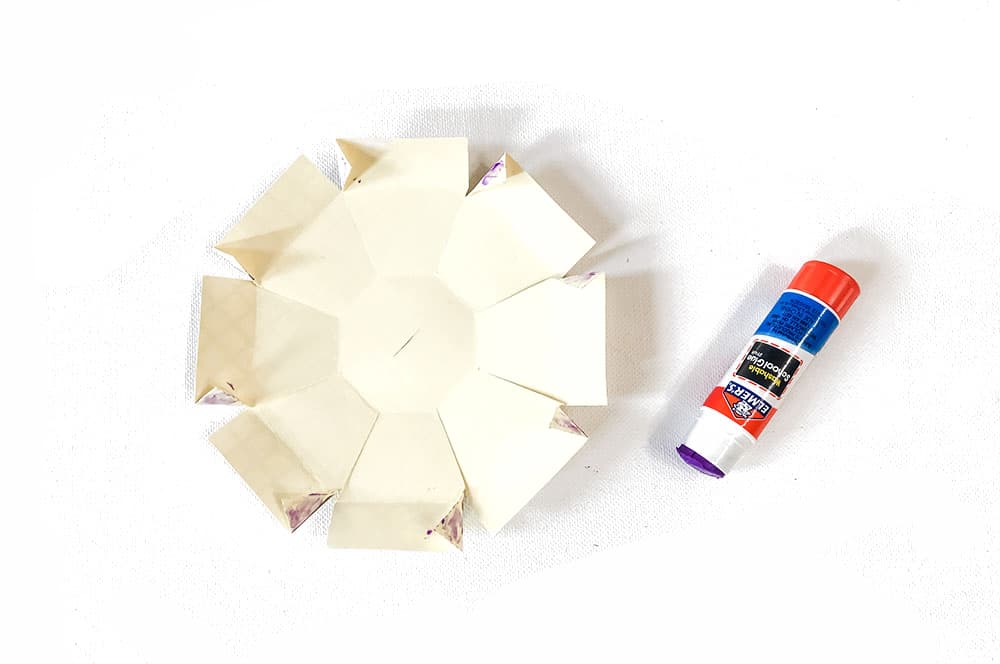
Once you’ve made all your creases, apply glue on all the tabs. Fold each side up to meet the next, lining the tabs up along the side and top and gluing them to the back.
If you’ve lined the pieces up correctly, you’ll notice that the cap pushes up toward the middle a bit. Gently turn the cap on its side and use the same technique we used for the body to make sure all sides are well-glued.
Let dry for 15-20 minutes.

Grab your stem piece, fold it in half to crease, apply a bit of glue to the inside, and push it together. Once your cap has completely dried, you can pull your stem piece through the cut you made in the middle of the cap, fold it along the inside, and glue it into place.

Your adorable acorn boxes are ready to fill! You can use these as favor boxes for treats or surprises, OR you can fill them with messages or tiny books of gratitude…
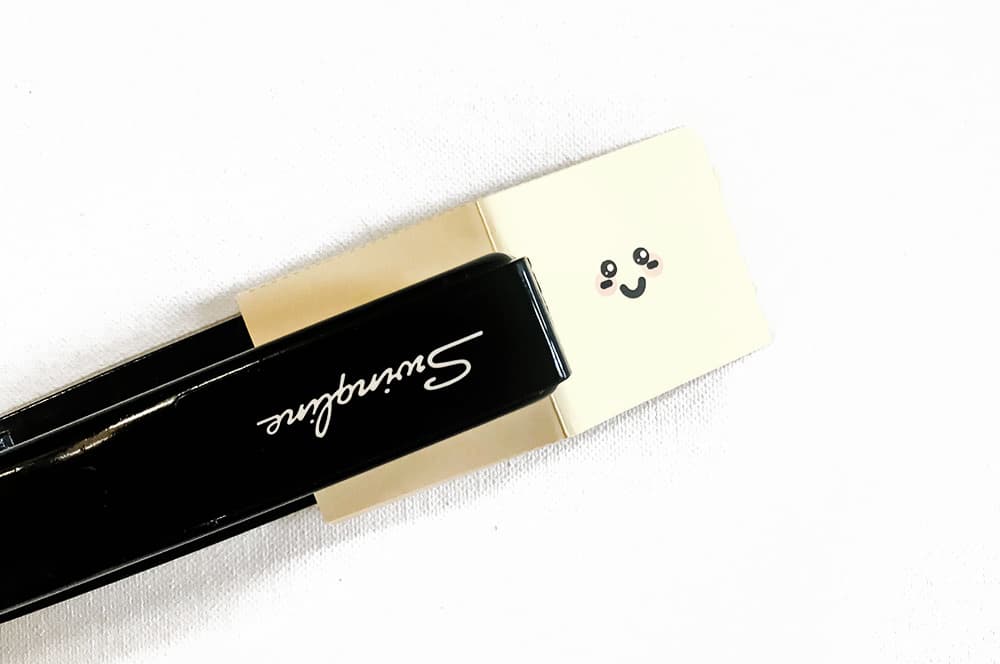
If you’ve printed out our mini gratitude book template page, cut along all the dotted lines.
Once you have your “pages” cut out, stack them (with the Kawaii smile page on top), fold them in half, then staple them along the half-fold to create your tiny handmade gratitude book. You can also just write messages of thanks on the cut pieces if you’d rather not make a book.

If you’ve decided to make a book, you can fill in the pages with written messages, cut out pictures, or make drawings of all the things you’re thankful for!
For more November kids’ fun that celebrates fall’s bounty, visit our full collection of harvest-themed crafts or make spiced cider sachets together (with free printable visual recipe cards and gift tags!).
As mentioned, these handmade paper boxes are a nice addition to your kids Thanksgiving table. You can combine them with our free printable Thanksgiving coloring book or turkey tinker tray ideas for make-ahead Thanksgiving Day kids entertainment.

And be sure to let us know how you’ve used them by tagging us with @barleyandbirch in your shares or leaving your idea in the comments below!
*A note about affiliate links: We strive to use simple, earth-friendly supplies that can be purchased locally whenever we can, but sometimes we find the best universally available options, a rare eco-friendly find, or a niche product only available on Blick Art Materials, Amazon, Etsy, or Woodpeckers Crafts. When included in our supply list, these products are affiliate links, and if you click through to make a purchase we receive a small commission that helps us re-order these supplies!
GETTING READY TO TRY this?
I love seeing all the ways people make these ideas their own! If you're sharing the results of one of our projects, mention or tag me with @barleyandbirch, or share it in the comments of one of our Pinterest project pins.


