

Five little pumpkins! With a bit of October magic (and a few well-placed velcro dots), you can turn simple cardboard pumpkins into an entertaining set of mini jack-o-lanterns that your little ones can fill with faces, decorate, design, take apart, then rebuild over and over again.

For another upcycled jack-o-lantern craft, use a leftover box to make our DIY 3D cardboard jack-o-lantern shape sorter!
Note: We prefer to shop locally or use what we have at home, but this list contains Woodpeckers Crafts, Etsy, Blick Art Materials, Bookshop.org and/or Amazon affiliate links for reference. As affiliates (and Amazon Associates), we make a small commission on qualifying purchases.*
BASIC SUPPLIES:
OPTIONAL SUPPLIES:
$2.99
A 14-page PDF set optimized for black & white printing.


For your jack-o-lantern features: Print out the desired feature pages onto heavy cardstock or cereal box sides that have been trimmed to fit your printer (you may want to run a test print through first to make sure your printer can handle the thickness of the box).
For your cardboard pumpkins: We printed our two large pumpkin template pages on copy paper, then traced the shapes onto squares of scrap cardboard.
You don’t have to print our templates – drawing imaginative jack-o-lantern features is a great creative exercise for kids all on its own! Sketch out your features and pumpkins onto cereal boxes or scrap cardboard and color or paint.
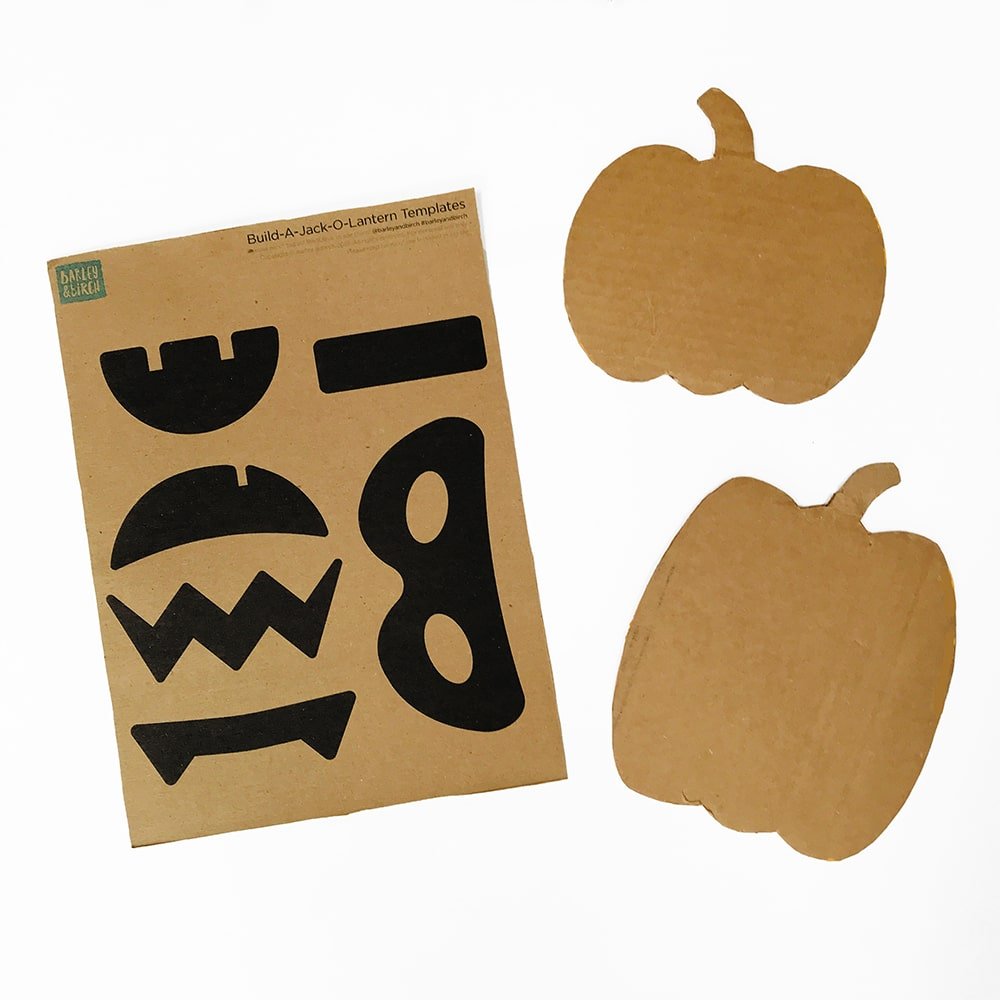
Choose which features you might like to put on your pumpkins and cut them all out. The more you cut out, the more faces you’ll be able to make!

Use scissors to cut out all of your features and pumpkins, then paint or color any way you’d like. Give ample time to dry if necessary.

We added small velcro dots to our pumpkins and features so we could design jack-o-lantern, mix-and-match pieces, and then use them for play. If you’re making these for younger kids, they add a nice sensory/fine motor skill development element as well!
You can use adhesive velcro dots, but we found that ours needed just the tiniest dab of hot glue to adhere permanently to the cardboard (especially the smaller elements).
That’s all there is to it! You can cut out as many pieces or pumpkin shapes as you like to build your own adorable jack-o-lanterns over and over again!
The perfect pumpkin-themed fun to pull out as soon as the leaves start turning and the air grows crisp!
From sensory exploration and dramatic play to math lessons and storytelling, these cardboard creations offer endless opportunities to engage children’s imaginations and curiosity…
As you mentioned, kids can explore different emotions by creating various jack-o-lantern faces. They can then discuss how each face makes them feel and relate it to real-life scenarios where they felt those emotions.
Print out two sets of pumpkins and features. Create one set of cardboard pumpkins, and use the second set of paper sheets to create some funny-faced jack-o-lanterns kids can search for. Hide the different cardboard pumpkins around a room, the house, or even in your yard.
Alternatively, you can provide descriptions of the features, and have kids search for the various jack-o-lantern face parts. Once they find them, they can then assemble them on their cardboard pumpkins.
The cutting, painting, and sticking this project employs is already a mini boot camp for fine motor skills. Adding embellishments like stickers, googley eyes, or tying on a string of beads can further challenge their pincer grip and precision. Even the act of attaching features with glue or tape requires a level of dexterity.
Once created, each of these little pumpkins will come alive with a personality of its own. Embrace the imaginative spirit with some Halloween storytelling.
You can use popular songs, movies, or other references for inspiration…” Five little pumpkins sitting on a gate…or a table, or a classroom floor…and what happened next?” Let the kids bring their pumpkin characters to life with epic tales of Halloween adventure. Who needs a campfire when you’ve got cardboard pumpkins?
Use handfuls of features, plus a few cardboard pumpkins for easy math lessons. Count ’em, sort ’em, categorize ’em.
You can quickly turn these little jacks into a number game for early learners by asking them to use a specific number of features, count all the features they’ve used on a collection of pumpkins, count specific features, or add and subtract cardboard pumpkins from a “patch.”
Help kids explore the color wheel with their pumpkin creations! Afterall all, why stick to orange when you can create a rainbow of gorgeous gourds??
By painting the pumpkins and their features, children can learn about different colors and how they can be mixed to create new ones. Or they can explore color palettes by using features in a variety of colors on multi-hued pumpkins.
Cardboard, paint, velcro – we already have the basics for a sensory smorgasbord. Add to the fun by covering a pumpkin with bubble wrap or tin foil. Use fuzzy fabric scraps or painted sandpaper for features.
Let the little ones explore different textures by building up features and faces using pumpkin spice playdough on their pumpkins. Tie small jingle bells to the stems of your pumpkins for sound stimulation.
Teach kids about the concept of symmetry using the cutout features. Cut the features in half, laying out the face halves on a pumpkin. Invite kids to choose from the features to create the mirror image and finish the faces.
Transform everyday spaces into enchanting Halloween hideaways. Invite kids to collaborate on a BIG playroom or classroom cardboard pumpkin patch that will add an air of handmade autumn magic to any corner.
Turning these cardboard pumpkins into stick puppets is a piece of cake! Once the kids have crafted their cardboard pumpkins with all their desired features, they simply need to attach a popsicle stick, wooden dowel, or twig to the back of each pumpkin.
They can use strong tape or a hot glue gun (with adult supervision) to secure the stick. Voila! They’ve got themselves a festive jack-o-lantern stick puppet fit for a Halloween puppet show spectacular!
Welcome to the pumpkin shop! Or the haunted pumpkin patch! Or the pumpkin haunted house! Add a dash of imagination along with a few simple props (think hay bales, leaves, a hanging moon and star cutouts, a pumpkin patch sign, small rakes, fairy lights, a cauldron, a witch’s hat or brooms) and the dramatic play possibilities are endless!

In the vibrant world of art education, the humble cardboard pumpkin can be transformed into a canvas that introduces students to the styles of renowned artists. Suitable for both younger and older art students alike, these ideas will inspire you to roll up your sleeves, gather your art supplies, and get ready to embark on a pumpkin-themed journey through the world of art…
For a few more seasonal “build-your-own” crafts, be sure to visit our build-a-felt-turkey DIY and felt fall rainbow tree tutorial.
Here for the boos? We have Halloween covered with this adorable free printable Halloween doodle book, some super hip upcycled costume ideas, a roundup of our fav modern no-carve pumpkins, and even a recipe (and ghost stickers!) for healthy homemade Ecto-Cooler!
A note about Amazon affiliate links: We strive to use simple, earth-friendly supplies that can be purchased locally whenever we can, but sometimes we find the best universally available options, a rare eco-friendly find, or a niche product only available on Amazon. When included in our supply list, these products are affiliate links, and if you click through to make a purchase, we receive a small commission that helps us re-order these supplies!
GETTING READY TO TRY this?
I love seeing all the ways people make these ideas their own! If you're sharing the results of one of our projects, mention or tag me with @barleyandbirch, or share it in the comments of one of our Pinterest project pins.


